Give paid Moodle courses with CinetPay
- # Give paid Moodle courses with CinetPay
- PRESENTATION
- TO READ ABSOLUTELY BEFORE GOING FURTHER
- REQUIREMENT
- INSTALLATION AND CONFIGURATION OF THE MODULE
- DOCUMENTATION UPDATE
Find out how CinetPay products combine perfectly with the Moodle CMS.
PRESENTATION
OBJECTIVE OF THE MODULE
This tutorial is intended for all merchants who have subscribed to the CinetPay offer and are relying on the Moodle platform to carry out paid courses online. It describes step-by-step the integration of the payment module.
THE FEATURES OF THE MODULE
The payment module offers the following features:
- Compatible with Moodle version 2.7 and higher
- Systematic update of orders at the end of payment via a silent url (notification url)
- Optional settings
TO READ ABSOLUTELY BEFORE GOING FURTHER
The most common error is the notification URL. The notification URL is the only mechanism that allows the CinetPay platform to notify you of the end of the payment. It is essential to understand the difference between the notification url and the return url which is only called if the buyer clicks on return to the store.
Common mistakes :
- If your Moodle store is under maintenance
- If you have added an .htaccess to the notification url
- If you have blocked IP addresses from the payment platform
- If your site does not use international ISO currency codes
Please check that your site is available or that your notification url is functional:
CinetPay uses the user account information to enable credit card payment. If this universe is not present on the CinetPay counter. Please make sure that the information: email, address, city, country, state, postal address are filled.
REQUIREMENT
Before proceeding with the integration of the payment module, please ensure that you have the following items:
- Payment module file: CinetPay_Moodle_v3.0.0.zip
- Your store's identifier (site ID)
- Apikey
As a reminder, your CinetPay Back Office is available at this address: www.cinetpay.com.
INSTALLATION AND CONFIGURATION OF THE MODULE
Before installing or updating this payment module, please make sure that you have :
- Performed a backup of your database:
1) INSTALLATION OF THE PAYMENT MODULE
To install the payment module:
Log in as "Administrator" on your site. Then go to the "Site Administration" menu, then "Plugins". Then click on "Install plugins", click on "Choose a file..." then "Upload a file" and find the file CinetPay- moodle_3.0.0.zip on your hard drive. Then click on "Installer le plugin à partir du fichier ZIP":
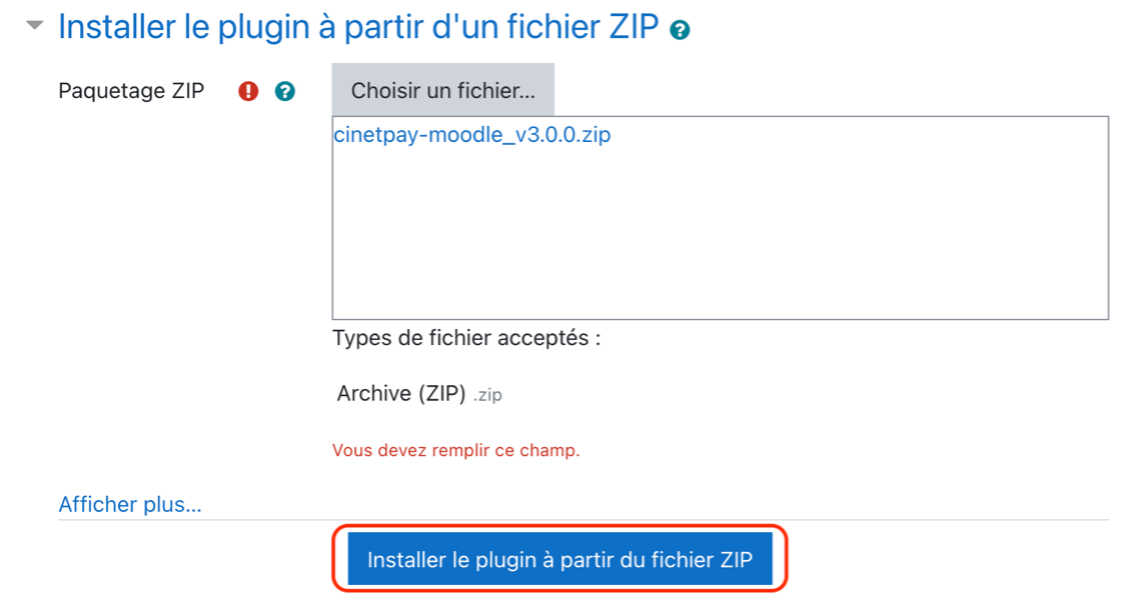
Then click on "Continuer"

Once this is done, update the database:

Congratulations, you have successfully installed the CinetPay module for Moodle
2) SETTING UP THE PAYMENT MODULE
From the admin panel, go to Plugins / Vue d'ensemble des plugins:

Then click on Additional Plugins, then on "CinetPay Paiement" Settings. You will then see the CinetPay settings available:
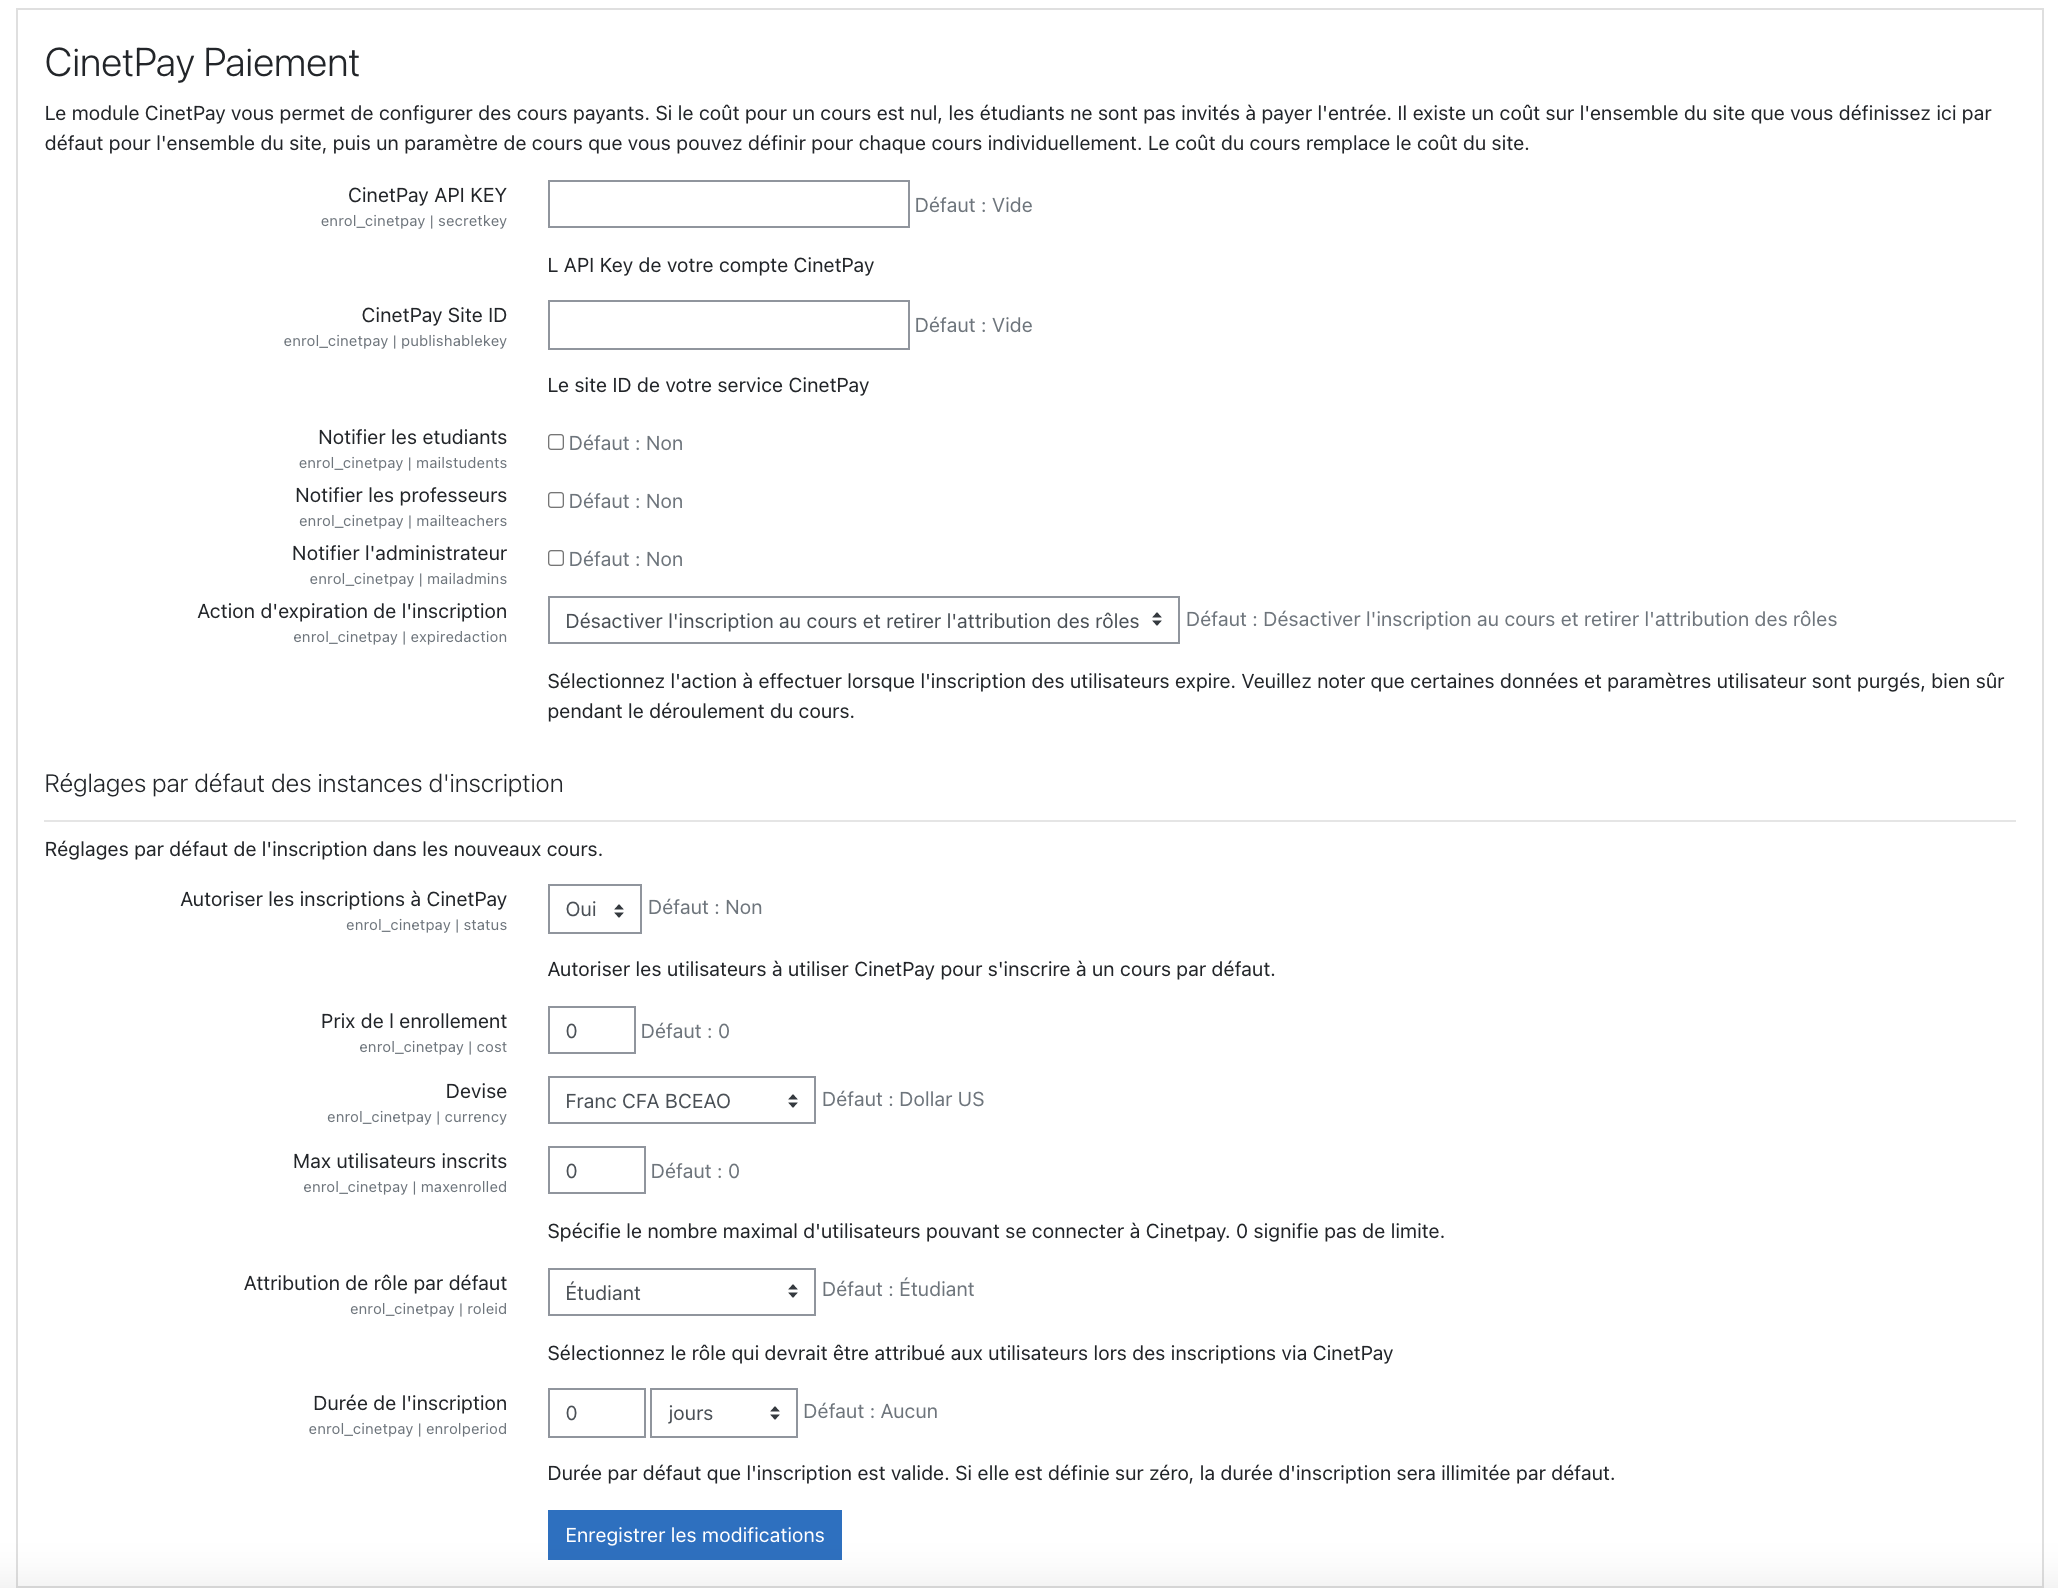
Enter the information that corresponds to your merchant account, as well as the Default registration information.
Don't forget to activate the module:

Look for the line "CinetPay Paiement", then click on the "eye" icon to activate the module CinetPay module among the Registration modules:

You have successfully configured the availability of the CinetPay module, you can now create or make paid courses
3) PAYMENT COURSE SETTINGS
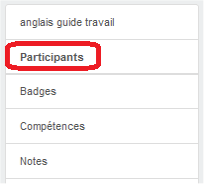
Once the configuration of the module is completed, you must configure the course(s) that are paid. Still logged in as an administrator, click on "Site Home", then choose the course that will be paid, then click on "Participants".
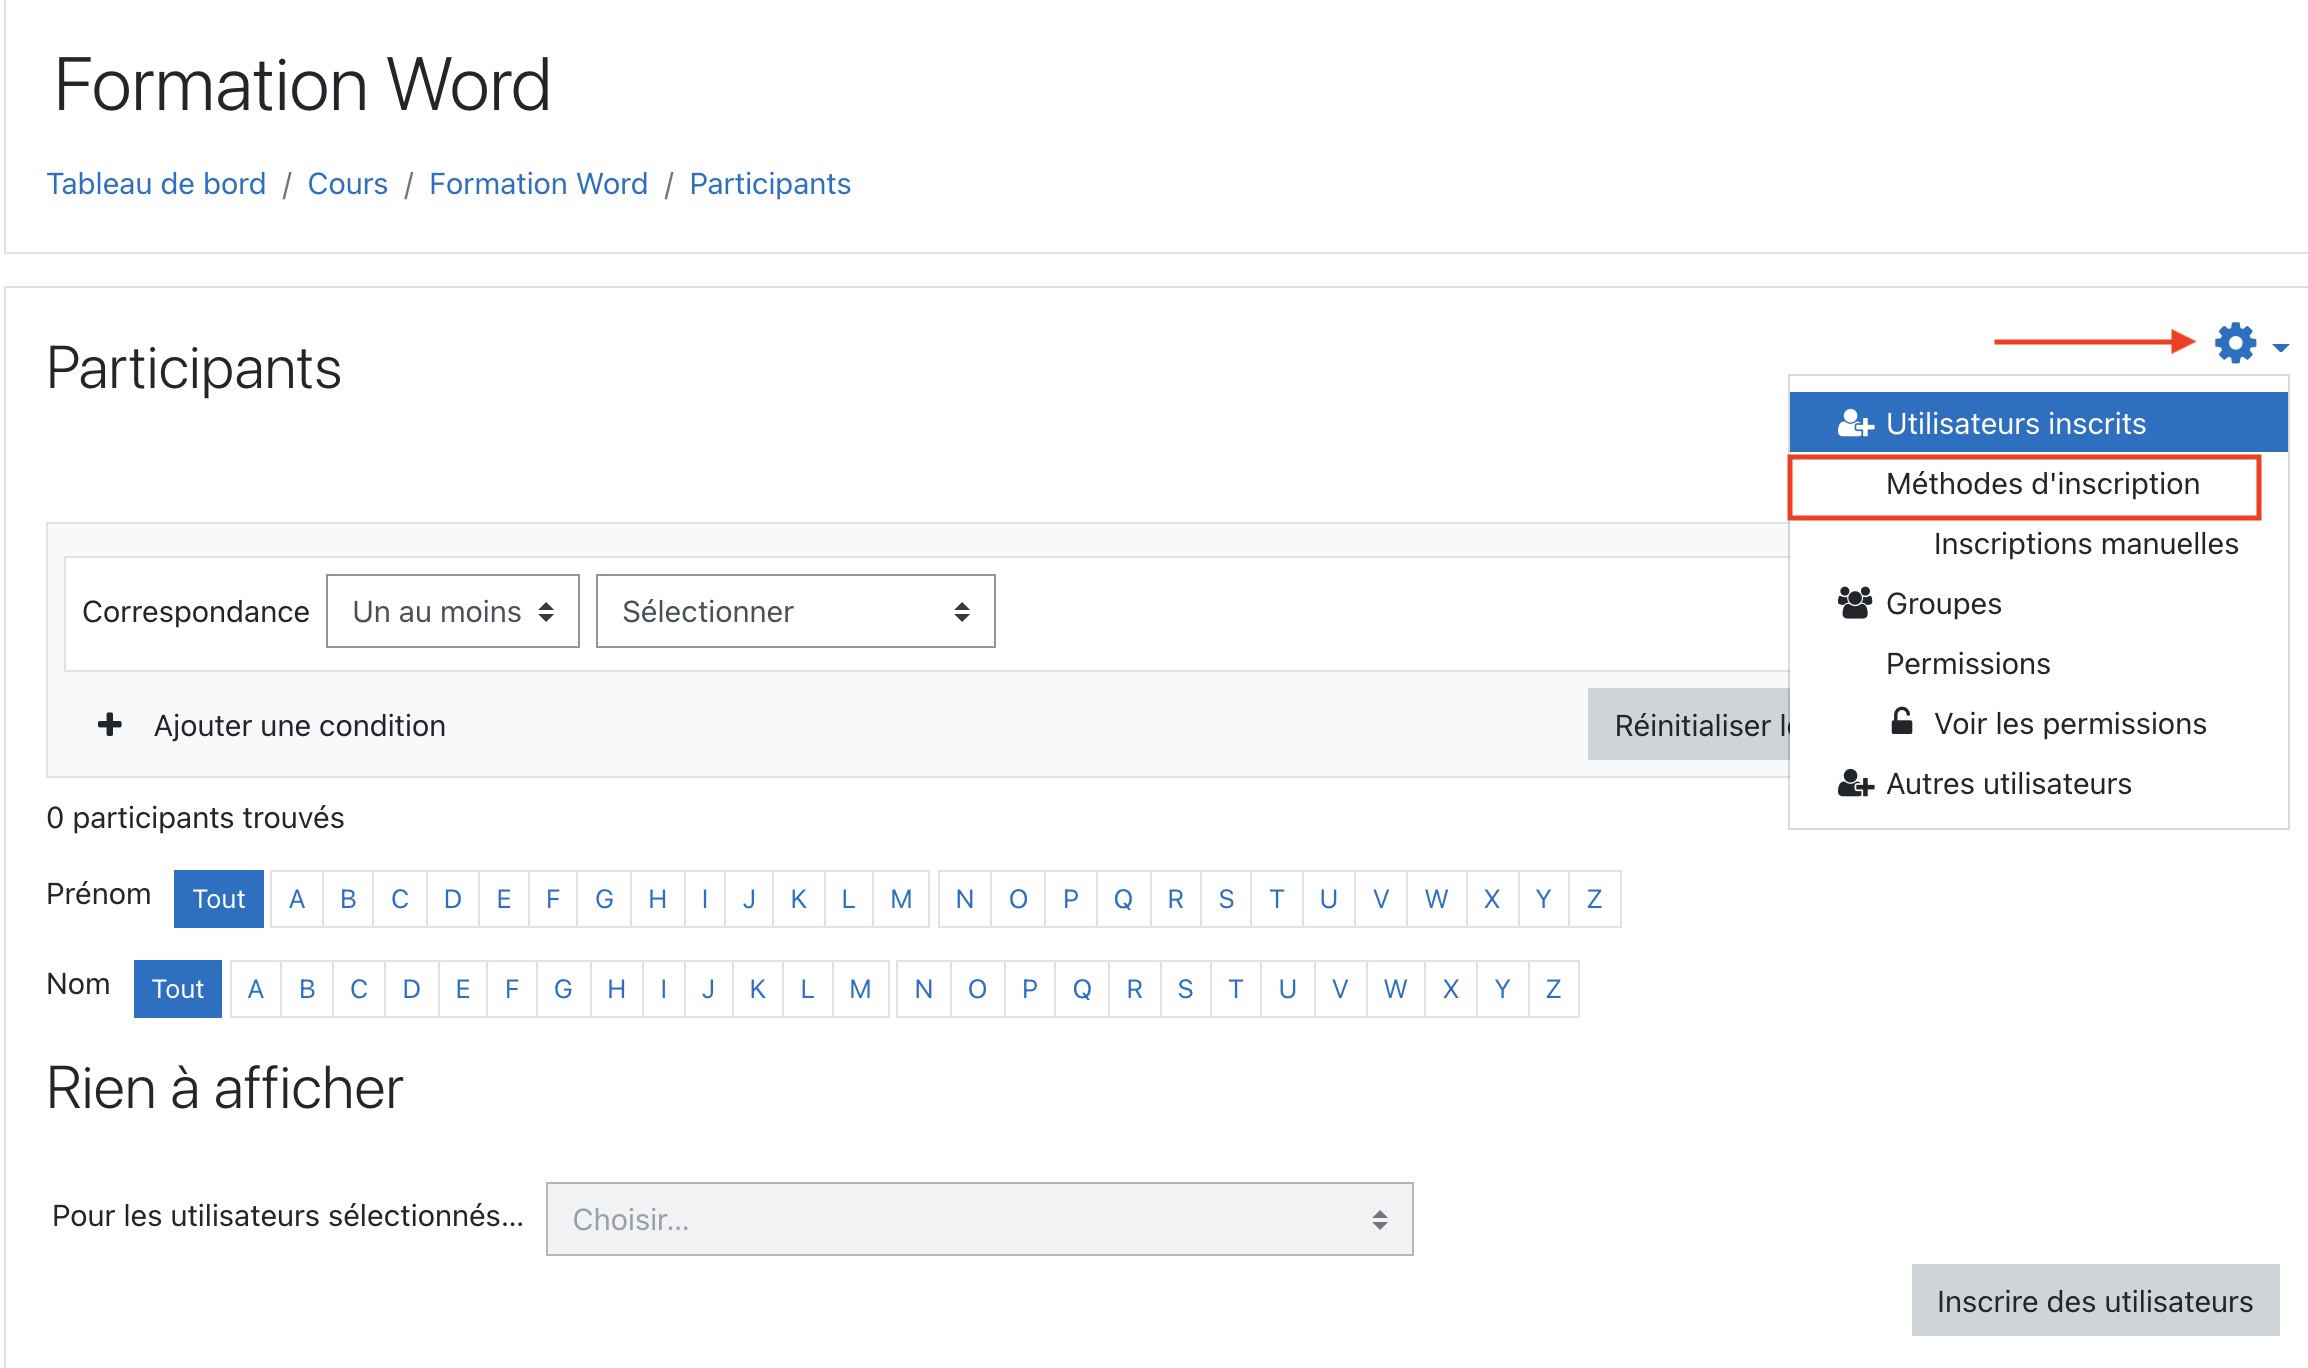
Then, Click on the icon on the right, then click on "Méthodes d'inscription":
Please add the method: CinetPay Paiement, then configure the :
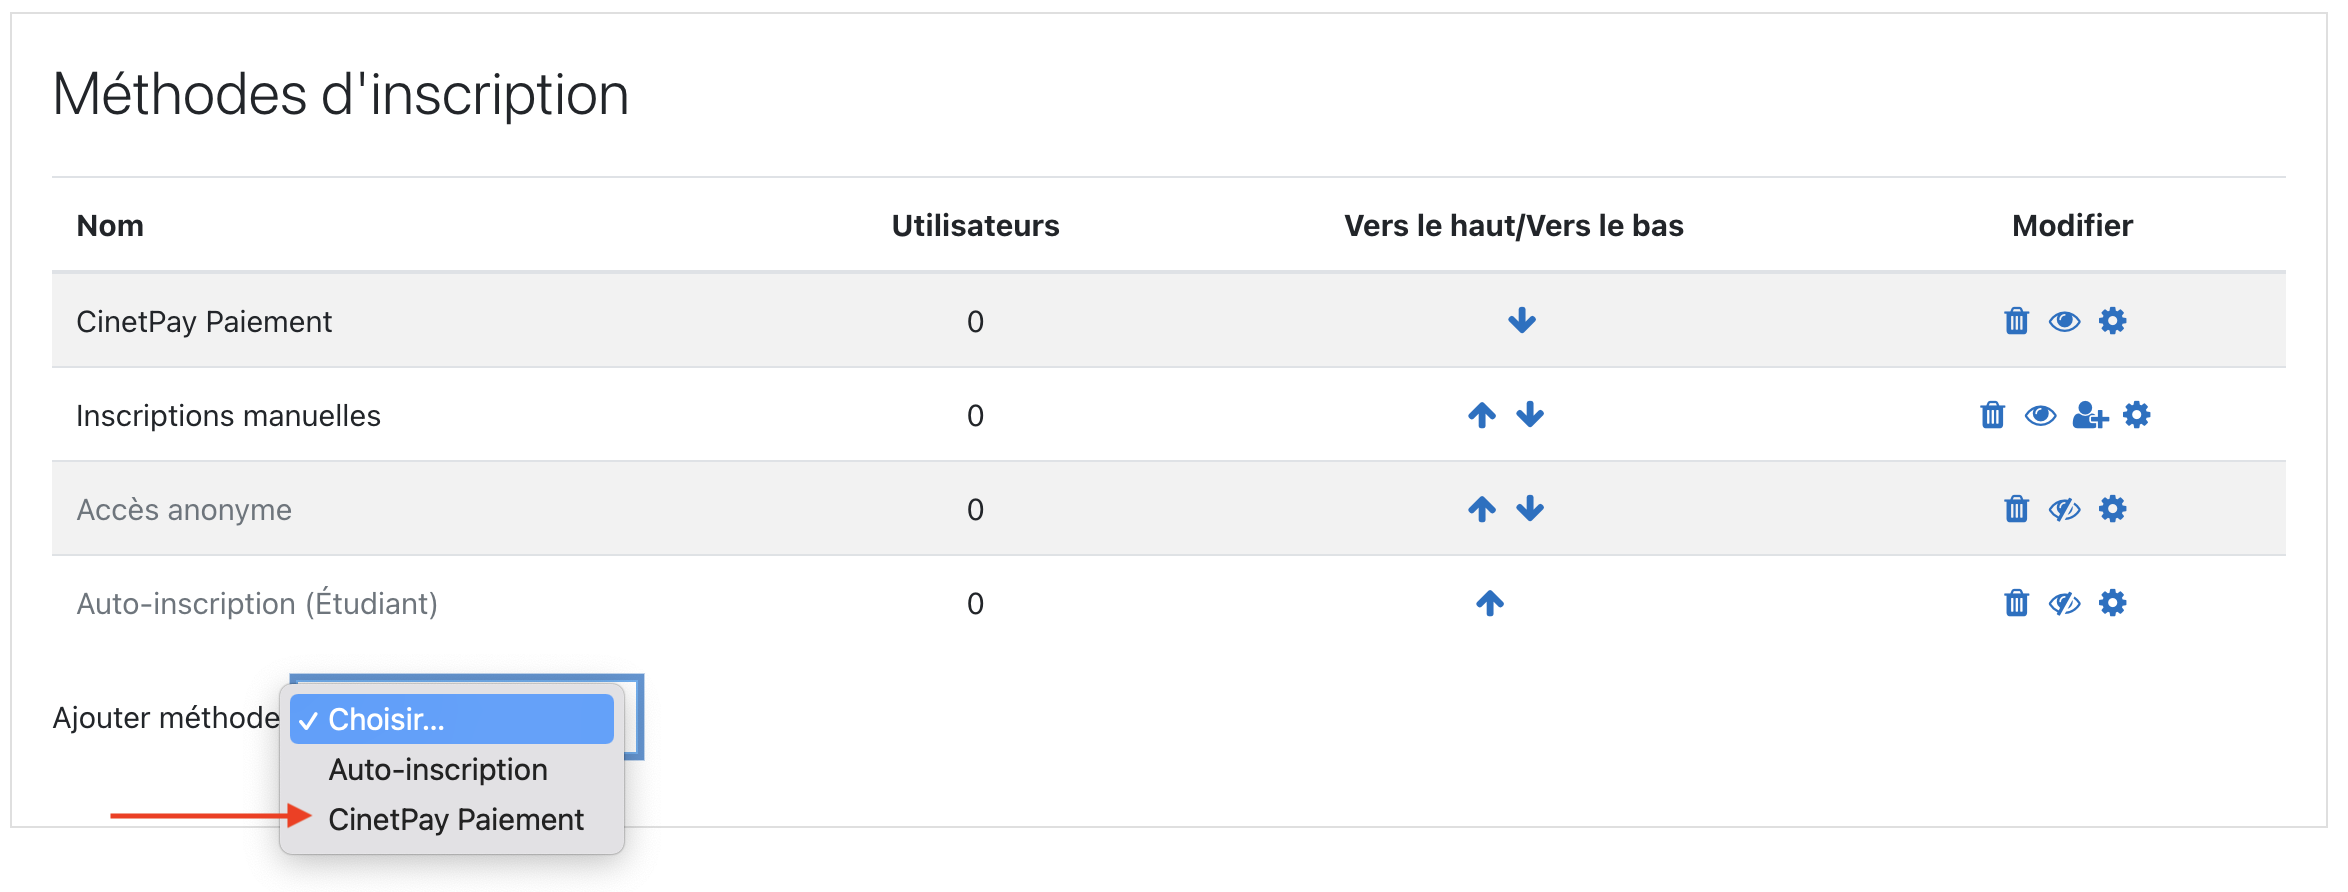
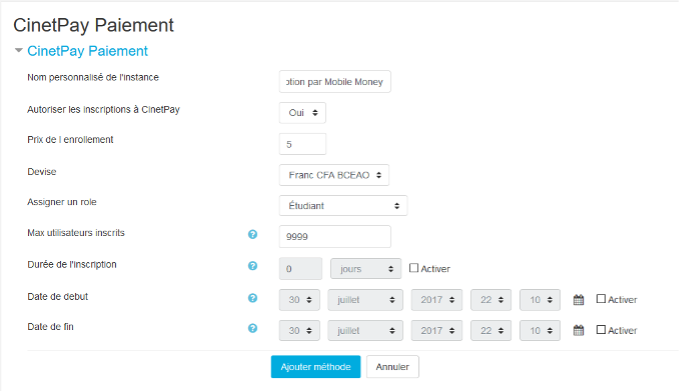
Once this is done, click on "Add Method". If you want to make the course pay only, please activate only the instance of the CinetPay method, i.e. disable all other methods.
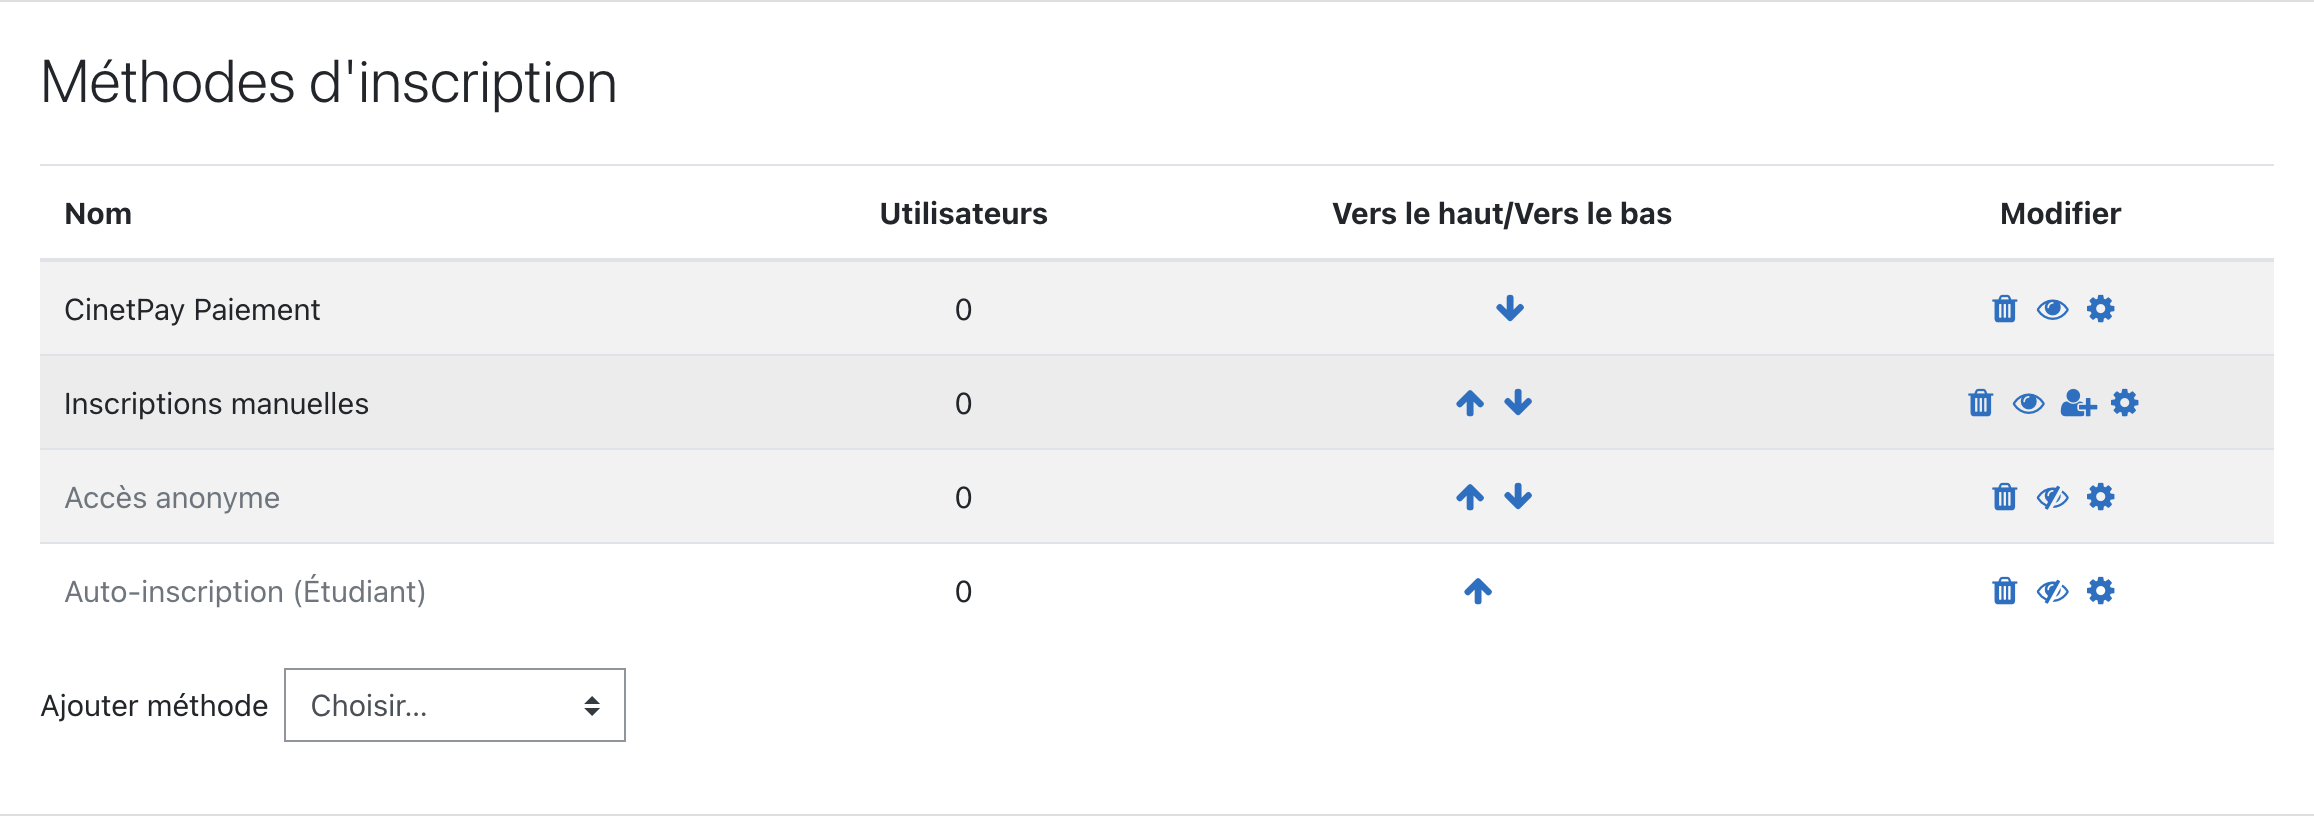
NB: To use the CinetPay payment method, the user must first have an account
DOCUMENTATION UPDATE
In order to constantly improve the understanding and proper use of this product documentation, constructive feedback from users is important.
Please send your suggestions to this address : hello@cinetpay.com