Increase your sales with CinetPay for WHMCS
- # Increase your sales with CinetPay for WHMCS
- Features of the module
- READ ABSOLUTELY BEFORE GOING FURTHER
- Frequent problems
- Requirement
- MODULE INSTALLATION AND PARAMETERISATION
- Update of the documentation
The agility of CinetPay coupled with the power of WHMCS. Manage your customers and transactions with ease.
Features of the module
- Compatible with versions between WHMCS 7 and 8.2
- Redirection to the invoice at the end of the payment
- Payment via Mobile Money,
- Payment via Wallets
- Payment via Visa & MasterCard
- Currency conversion
READ ABSOLUTELY BEFORE GOING FURTHER
The module uses the information of the customer registered during the order to display the different payment methods, make sure that your customers fill in the information such as email, address, city, country, state, l postal address in order to be able to pay by credit card.
Frequent problems
It sometimes happens that the CinetPay payment module does not appear in the list of payment methods (Front Office side).
This case can occur under the following conditions:
- The option show when ordering is disabled. This option is located in the menu Payments / means of payment / Manage Existing Gateways .
{danger.fa-close} If you have already set up the module, don't forget to get the site ID and APIKEY before resetting.
Requirement
Before proceeding with the integration of the payment module, please make sure you have the following elements:
- Payment module file: CinetPay_Whmcs_v3.0.0.zip
- Your store identifier (site ID)
- Apikey
As a reminder, your CinetPay Back Office is available at this address www.cinetpay.com.
MODULE INSTALLATION AND PARAMETERISATION
1) Installation of the payment module
To add the CinetPay payment method to your Whmcs store, you must:
- Unzip the payment module file; you find a folder named modules
- Inside the modules folder, you will find two folders gateways and callback
- Copy the items from the gateways folder to your WHMCS / modules / gateways directory
- Then copy the element from the callback folder to your WHMCS / modules / gateways / callback directory
2) Activation of the payment module
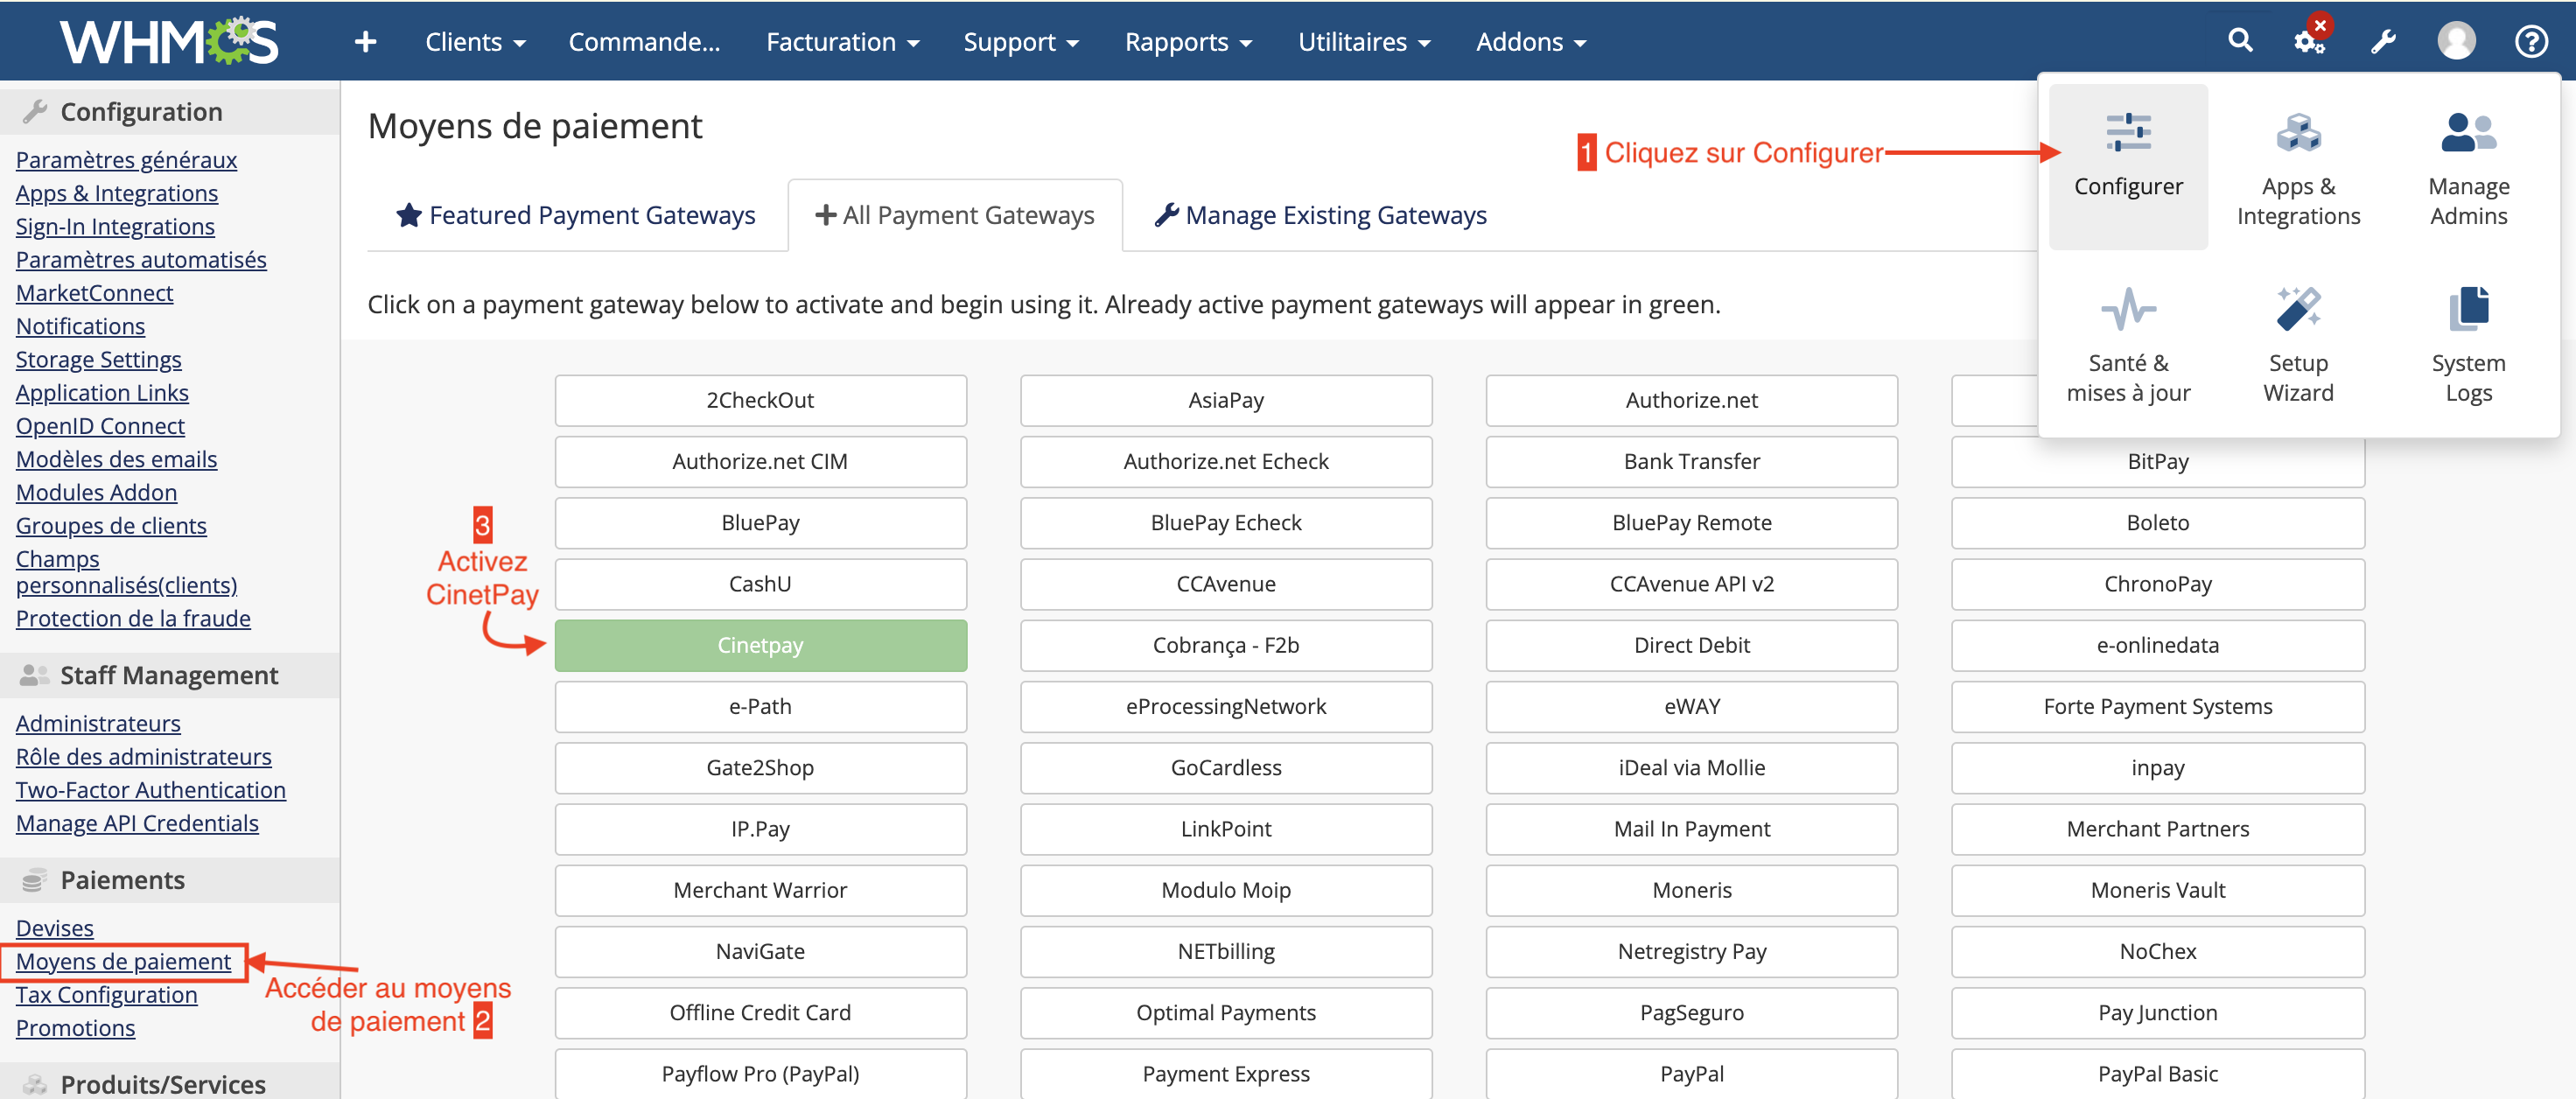
Once the module is installed, navigate on your whmcs back office, the menu Configure / Payment method in order to activate the CinetPay module.
3) Setting up the payment module
Once the module is installed, go to the existing Payment manager to configure the module.

-
Show when ordering (1) : Activate this option so that the option to pay with CinetPay is visible on the store
-
Display the name (2) : The name of the payment method (Do not modify it)
-
SiteId (3) : Indicate your username available on your CinetPay back office
-
Apikey (4) : Indicate your apikey available on your back-office
-
Payment Currencies (5) : The CinetPay module allows you to convert and display on the CinetPay counter the amount in the currency of the payer's country.
4) Activate payment by credit card
To display the credit card payment option on the new module the user will have to fill in the following fields in the address part of the order form of your store

- First name(A) : the client's first name(s)
- Name(B) : the client's name
- Email(C): the client's email
- Phone(D) : the customer's number
- Address (F): Customer's address
- City (G): Customer's city
- Country State (H) : Country State (in case of a federal country)
- Postal Code (I) : Client's postal code
- Country (J) : the country of the client
{danger.fa-close} -If your customer's country is not supported by CinetPay, they will not be able to continue with the payment
-CinetPay is only authorized to cash in local currency, by accepting the conversion offered by CinetPay, you will accept a conversion for information only.
- Convert for a treatment (6) : Whmcs allows you to convert the value for a treatment (Choose the None option)
Update of the documentation
In order to constantly improve the understanding and proper use of this product documentation, constructive comments from users are important elements.
Please send your suggestions to this address: hello @ cinetpay.com