Increase your sales by combining Prestashop and CinetPay
- # Increase your sales by combining Prestashop and CinetPay
- History of the module
- Features of the module
- READ ABSOLUTELY BEFORE GOING FURTHER
- Frequent problems
- Requirement
- MODULE INSTALLATION AND PARAMETERISATION
- Make a payment
- PrestaShop order number management
- Update of the documentation
Automatic synchronization of your Prestashop and CinetPay backoffices. Integrated in native for any Prestashop 1.7 account, downloadable in 1 click for 1.7 versions
History of the module
| Version | Date | note |
|---|---|---|
| 1.0.0 | 14/12/2015 | Changes to the manual. |
| 1.0.0 | 03/02/2016 | Update to the manuel |
| 2.0.0 | 30/09/2019 | Prestashop 1.7 compliant |
| 3.0.0 | 01/11/2021 | Integration of the new counter |
Features of the module
- Compatible with Prestashop 1.6 & 1.7,
- French language compatible,
- Multi currency compatible,
- Redirection to the store at the end of the payment,
- Management of failed payments (possibility of recording orders for which payment has failed),
- Systematic recording of orders at the end of payment via a silent url (notification url),
- Compatible with Prestashop URL rewrite function,
- Currency conversion of payment
- Cash payment,
- Payment via Mobile Money,
- Payment via Wallets
- Payment via Visa & Mastercard
READ ABSOLUTELY BEFORE GOING FURTHER
The most common mistake is the notification URL. The notification URL is the only mechanism allowing the CinetPay platform to notify you of the end of the payment. It is essential to understand the difference between the notification url and the return url which is only called if the buyer clicks on return to shop.
Frequent errors :
- If your Prestashop store is under maintenance
- If you have added a .htaccess on the notification url
- If you have blocked the IP addresses of the payment platform
Frequent problems
CinetPay does not appear in the payment methods :
It sometimes happens that the CinetPay payment module does not appear in the list of payment methods (Front Office side)
This case can occur under the following conditions:
-
Option Disable modules not developed by PrestaShop Check that the Disable modules not developed by PrestaShop option is not set to YES. This option is located in the Advanced parameters / Performance menu.
-
There is a restriction on the country where the payer is located Activate a list of countries in the International / Geographical area / Country menu
-
Your module needs to be reset This happens especially when many changes have been made from your Prestashop store. Resetting the module will allow you to resume the configurations of your store with the new parameters.
-
You do not have permission to configure this module The ps_module table in the database does not contain the CinetPay module row. Add the CinetPay row to the ps_module table.
{danger.fa-close} If you have already set up the module, don't forget to get the site ID and APIKEY before resetting.
Requirement
Before proceeding with the integration of the payment module, please make sure you have the following elements:
- Payment module file: CinetPay_Prestashop_v3.0.0.zip
- Your store identifier (site ID)
- Apikey
As a reminder, your CinetPay Back Office is available at this address www.cinetpay.com.
MODULE INSTALLATION AND PARAMETERISATION
1) Update of the module
To update the payment module, you must first uninstall and then remove the old version.
{danger.fa-close} Don't forget to take note of the parameters of your module before uninstalling it and in particular to take note of the production apikey and the ID of the store.
- To uninstall the payment module click on the Uninstall button in the drop-down list.
- Then click on Remove to delete the module from your store.
- You can install the new module, this step is described in the next chapter.
2) Adding the payment module
You have two options for adding the CinetPay payment module:
Automatic installation:
The first method is to add the payment module via the Prestashop Back Office.
In the administration interface of your store, in the module menu, select Add a new module and then select the payment module zip file.
Then click on the Load module button.
Manual Installation:
The second method is to copy the module via FTP. To do this, please copy the CinetPay directory into the modules directory of Prestashop.
3) Installation of the payment module
- In the menu of your Prestashop Back Office click on Modules then Module Manager.
- Select the Payment category to find more easily the module or make a search by typing CinetPay.
- On the CinetPay module click on the Install button.
- If a This module is not verified message appears, click on the Continue Installation button anyway. Continue the installation.
4) Setting up the payment module
To fully benefit from the payment module, a configuration is required.
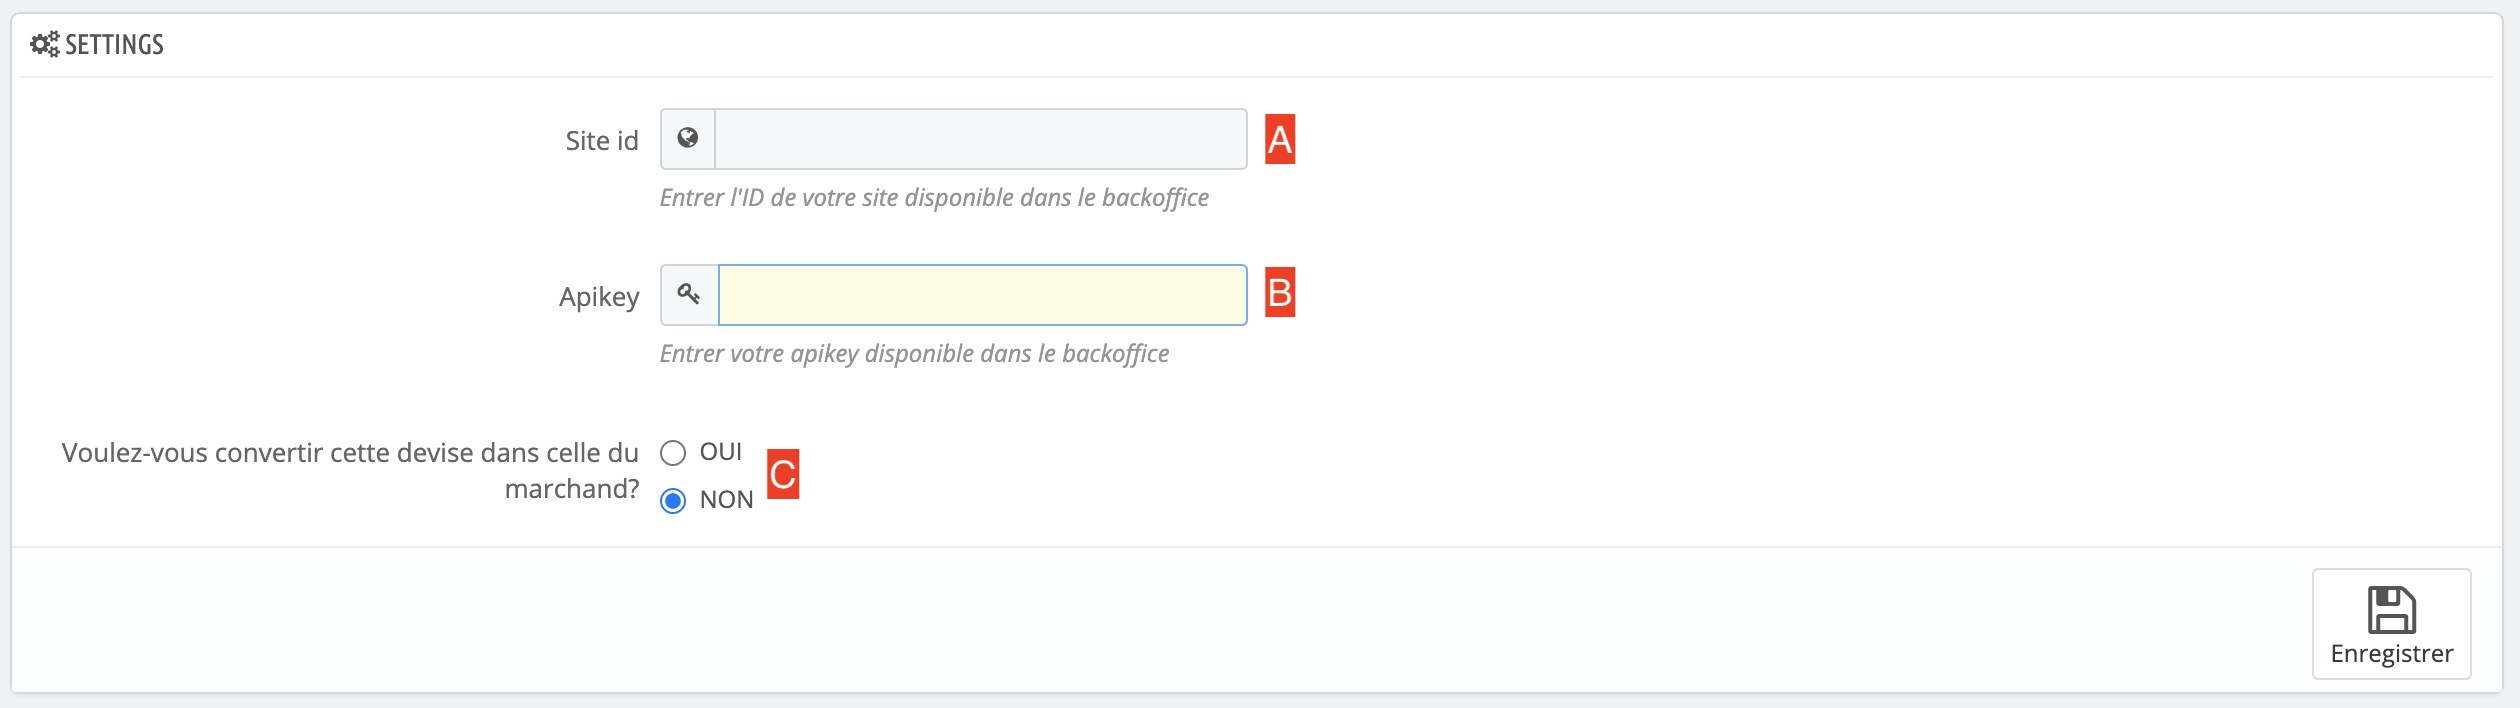
-
SiteId (A)** : Indicate your login available on your CinetPay back-office
-
Apikey(B)** : Indicate your apikey available on your back-office
-
(C) : The CinetPay module offers you to convert and display on the CinetPay counter the amount in the currency of the payer's country.
{danger.fa-close} a) If the country of your customer is not supported by CinetPay it will not be able to continue the payment
b) CinetPay is only allowed to collect in local currency, by accepting the conversion proposed by CinetPay, you will accept a conversion as an indication.
Make a payment
1) Activate the credit card payment option
This version of the payment counter no longer redirects the user to complete their payment by credit card. However, certain information available to the user must be provided to see the payment by credit card option at the CinetPay counter. The user must therefore fill in the following fields in the address part of the order form of your store to pay by credit card:

- First name (A) : the customer's first name (s)
- Name (B) : the name of the customer
- Address (C) : The customer's address
- Postal code (D) : Customer's postal code
- City (E) : the customer's city
- Country (F) : the customer's country
- Telephone (G) : the customer's number
2) Choose the CinetPay option

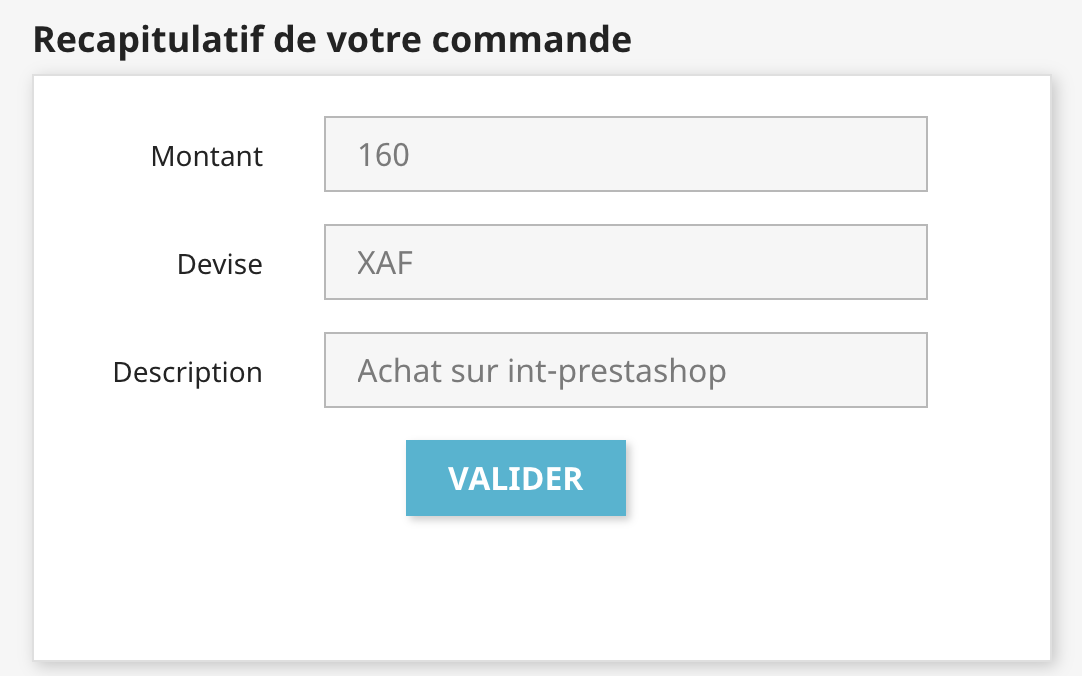
3) Check before you pay
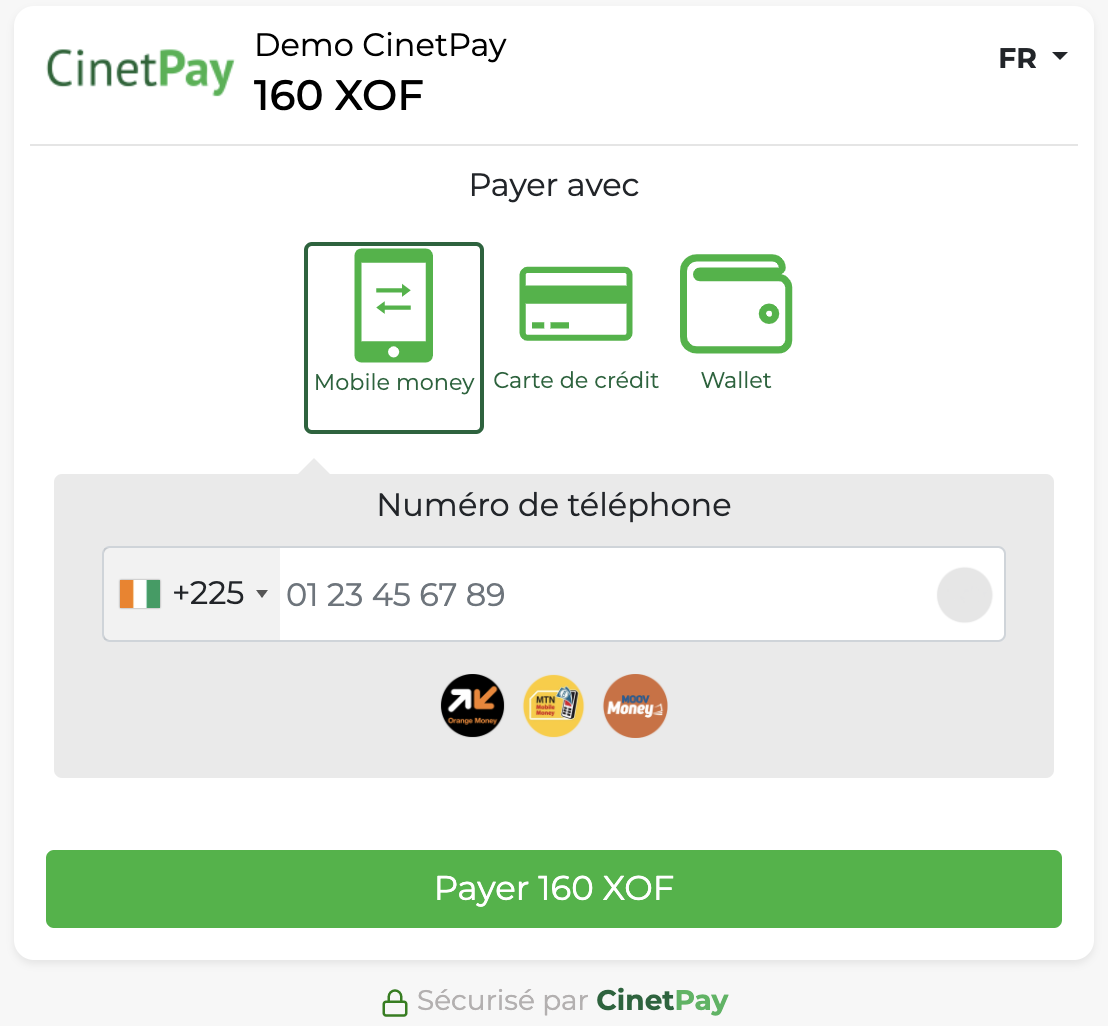
4) Choose your universe and pay
PrestaShop order number management
The PrestaShop order number is generated after the payment is finalized. Therefore, when Prestashop calls the payment platform, the order number does not exist. Only the basket number is generated and sent to the payment platform. In the CinetPay back office, the registered order number corresponds to the cart number in Prestashop. Thus, it is normal to not find the order number in the payment confirmation emails sent by CinetPay. Only the cart number appears.
Prestashop code modification: We propose a modification of the Prestashop code to display the cart number in the Prestashop order table. To do this, open the following file: AdminOrdersController.php (directory controllers /admin)
$this->fields_list = array ( 'id_order' => array( 'title' => $this->l('ID'),
                             'align' => 'text-center', 'class' => 'fixed-width-xs'),

//Rajoutez le code suivant:
'id_cart'=> array(
'title' => $this->l('Panier'), 'align' => 'center',
'width' => 25),
The addition of this code will allow you to display a Cart column between the ID and Reference columns.
Update of the documentation
In order to constantly improve the understanding and proper use of this product documentation, constructive feedback from users is significant. Please send your comments and suggestions via the Prestashop Addons website.